iblai-account
Compare original and translation side by side
🇺🇸
Original
English🇨🇳
Translation
Chinese/iblai-account
/iblai-account
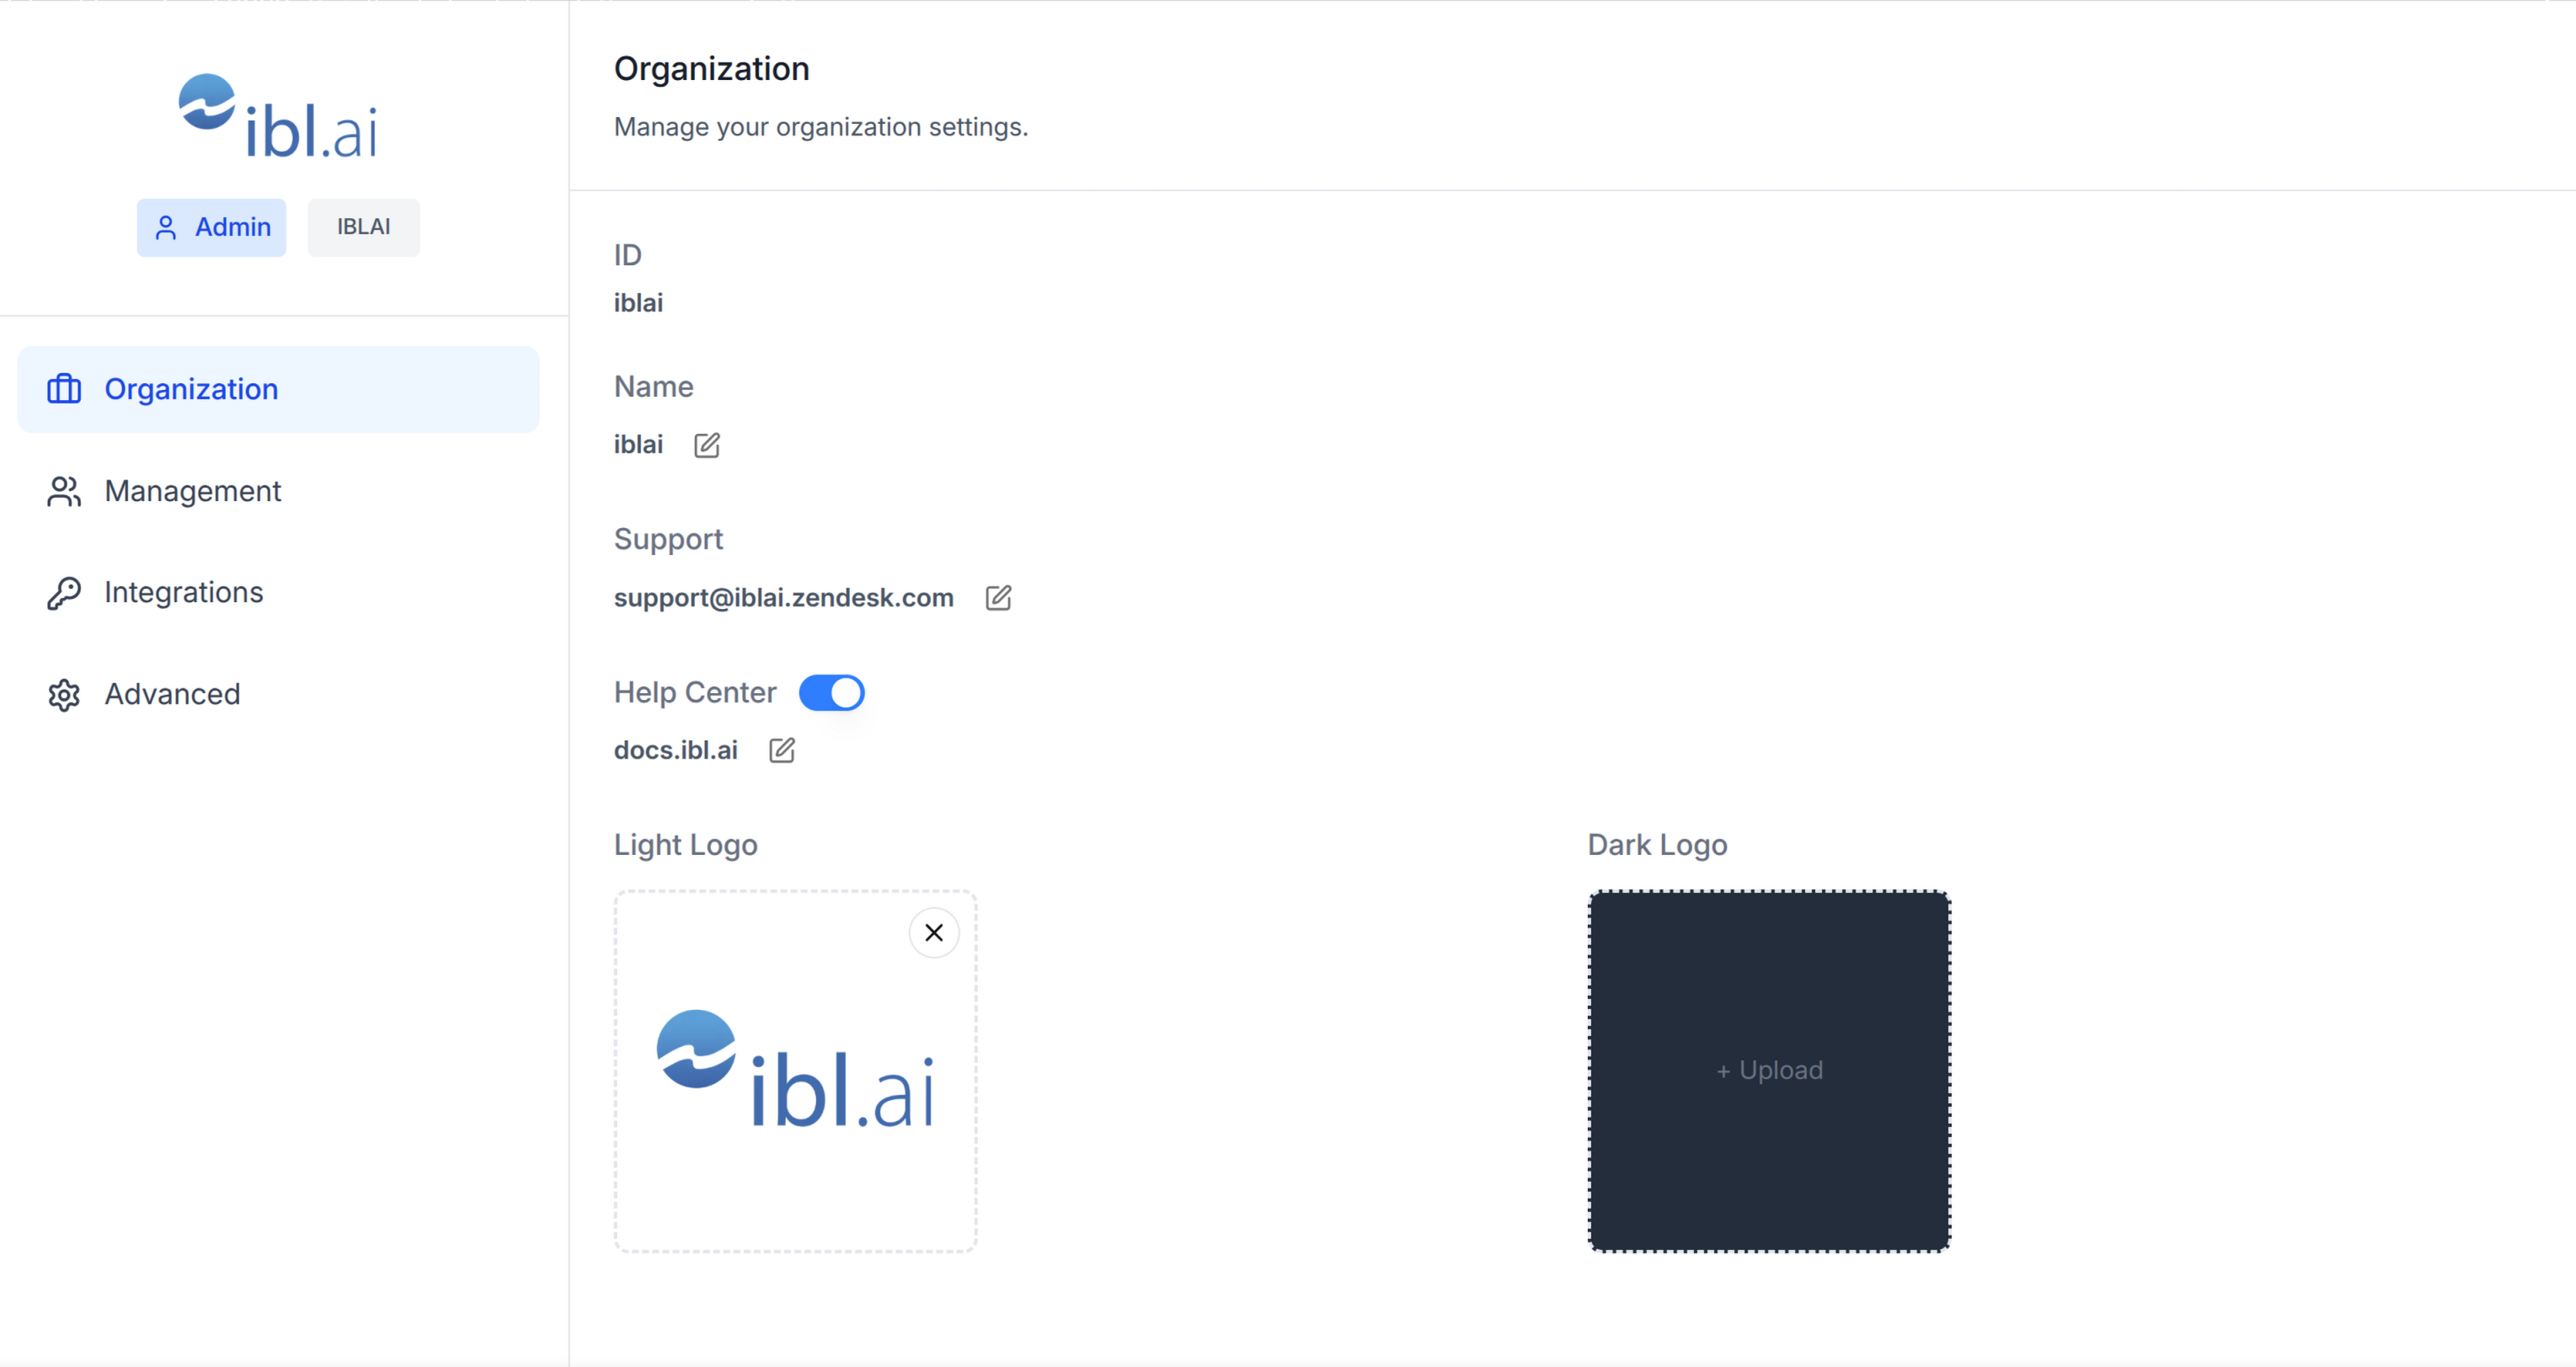
Add an account/organization settings page with tabs for Organization info,
User Management, Integrations, Advanced settings, and Billing.
AI Assistant: Do NOT add custom styles, colors, or CSS overrides to ibl.ai SDK components. They ship with their own styling. Keep the components as-is. Do NOT implement dark mode unless the user explicitly asks for it.When building custom UI around SDK components, use the ibl.ai brand:
- Primary:
, Gradient:#0058cclinear-gradient(135deg, #00b0ef, #0058cc)- Button:
bg-gradient-to-r from-[#2563EB] to-[#93C5FD] text-white- Font: System sans-serif stack, Style: shadcn/ui new-york variant
- Use shadcn components for custom UI -- they share the same Tailwind theme and render in ibl.ai brand colors automatically.
You MUST runbefore telling the user the work is ready./iblai-testAfter all work is complete, start a dev server () so the user can see the result at http://localhost:3000.pnpm devis NOT aiblai.envreplacement — it only holds the 3 shorthand variables (.env.local,DOMAIN,PLATFORM). Next.js still reads its runtime env vars fromTOKEN..env.localUseas the default package manager. Fall back topnpmif pnpm is not installed. The generated app should live in the current directory, not in a subdirectory.npm
添加包含组织信息、用户管理、集成、高级设置和账单选项卡的账户/组织设置页面。
AI助手提示: 请勿为ibl.ai SDK组件添加自定义样式、颜色或CSS覆盖,它们自带样式,请保持组件原有状态。除非用户明确要求,否则不要实现dark mode。围绕SDK组件构建自定义UI时,请使用ibl.ai品牌规范:
- 主色:
, 渐变:#0058cclinear-gradient(135deg, #00b0ef, #0058cc)- 按钮:
bg-gradient-to-r from-[#2563EB] to-[#93C5FD] text-white- 字体: 系统无衬线字体栈, 样式: shadcn/ui new-york 变体
- 自定义UI请使用shadcn组件——它们共用同一套Tailwind主题,会自动适配ibl.ai品牌色渲染。
告知用户工作已完成前,你必须先运行。/iblai-test所有工作完成后,启动开发服务器(),用户即可在http://localhost:3000查看结果。pnpm dev不是iblai.env的替代品——它仅存储3个简写变量(.env.local、DOMAIN、PLATFORM),Next.js仍然从TOKEN读取运行时环境变量。.env.local默认使用作为包管理器,如果未安装pnpm则回退到pnpm。生成的应用应放在当前目录下,不要放在子目录中。npm
Prerequisites
前置要求
- Auth must be set up first ()
/iblai-auth - MCP and skills must be set up:
iblai add mcp
- 必须先完成Auth配置()
/iblai-auth - 必须完成MCP和skills配置:
iblai add mcp
Step 0: Check for CLI Updates
步骤0:检查CLI更新
Before running any command, ensure the CLI is
up to date. Run to check the current version, then
upgrade directly:
iblaiiblai --version- pip:
pip install --upgrade iblai-app-cli - npm:
npm install -g @iblai/cli@latest
This is safe to run even if already at the latest version.
运行任何命令前,请确保CLI为最新版本。运行查看当前版本,然后直接升级:
iblaiiblai --version- pip:
pip install --upgrade iblai-app-cli - npm:
npm install -g @iblai/cli@latest
即使已经是最新版本,运行该命令也不会有问题。
Step 1: Check Environment
步骤1:检查环境
Before proceeding, check for a
in the project root. Look for , , and variables.
If the file does not exist or is missing these variables, tell the user:
"You need an with your platform configuration. Download the
template and fill in your values:
"
iblai.envPLATFORMDOMAINTOKENiblai.envcurl -o iblai.env https://raw.githubusercontent.com/iblai/vibe/refs/heads/main/iblai.env继续操作前,请检查项目根目录下是否存在文件,确认里面包含、和变量。如果文件不存在或缺少这些变量,请告知用户:
"你需要一个包含平台配置的文件。下载模板并填写对应值:
"
iblai.envPLATFORMDOMAINTOKENiblai.envcurl -o iblai.env https://raw.githubusercontent.com/iblai/vibe/refs/heads/main/iblai.envStep 2: Run the Generator
步骤2:运行生成器
bash
iblai add accountbash
iblai add accountWhat Was Generated
生成的内容
| File | Purpose |
|---|---|
| Account/organization settings page with tabs |
The page reads , /, and from
localStorage. Admin status is derived from the array.
userDatatenantcurrent_tenanttenantstenantsNote: Thecomponent usesAccountinternally -- it is imported fromnext/image.@iblai/iblai-js/web-containers/next
| 文件 | 用途 |
|---|---|
| 带选项卡的账户/组织设置页面 |
该页面从localStorage读取、/和,管理员身份从数组中推导得出。
userDatatenantcurrent_tenanttenantstenants注意:组件内部使用了Account——它从next/image导入。@iblai/iblai-js/web-containers/next
Step 3: Use MCP Tools for Customization
步骤3:使用MCP工具自定义
get_component_info("Account")get_component_info("Account")<Account>
Props
<Account><Account>
属性
<Account>Required
必填属性
| Prop | Type | Description |
|---|---|---|
| | Tenant/org key |
| | Full list of user tenants from localStorage |
| | Username |
| | Called when "Invite user" is clicked |
| | Cancel/close callback |
| | Auth service URL |
| | Controls tab visibility -- most tabs require |
| 属性 | 类型 | 描述 |
|---|---|---|
| | 租户/组织标识 |
| | 从localStorage获取的用户所属租户完整列表 |
| | 用户名 |
| | 点击「邀请用户」时触发的回调 |
| | 取消/关闭回调 |
| | 认证服务URL |
| | 控制选项卡可见性——大多数选项卡需要该值为 |
Optional
可选属性
| Prop | Type | Description |
|---|---|---|
| | Initial tab: |
| | Base domain for custom domain settings |
| | Current app identifier (e.g., |
| | Stripe billing portal URL -- shows Billing tab |
| | Stripe top-up URL -- shows Billing tab |
| | Enable RBAC permission checks for Management |
| | Show tenant name badge in sidebar |
| | Use Gravatar when no org logo |
| 属性 | 类型 | 描述 |
|---|---|---|
| | 初始展示的选项卡: |
| | 自定义域名设置的基础域名 |
| | 当前应用标识符(例如 |
| | Stripe账单门户URL——配置后会显示账单选项卡 |
| | Stripe充值URL——配置后会显示账单选项卡 |
| | 为管理模块启用RBAC权限校验 |
| | 在侧边栏显示租户名称徽章 |
| | 没有组织logo时使用Gravatar作为 fallback |
Tabs
选项卡说明
| Tab | Requires |
|---|---|
| Organization | |
| Management | RBAC permissions |
| Integrations | |
| Advanced | |
| Billing | |
| 选项卡 | 要求 |
|---|---|
| 组织信息 | |
| 管理 | 拥有对应的RBAC权限 |
| 集成 | |
| 高级设置 | |
| 账单 | 配置了 |
Step 4: Verify
步骤4:验证
Run before telling the user the work is ready:
/iblai-test- -- must pass with zero errors
pnpm build - -- vitest must pass
pnpm test - Start dev server and touch test:
bash
pnpm dev &
npx playwright screenshot http://localhost:3000/account /tmp/account.png
告知用户工作完成前请运行:
/iblai-test- ——必须零错误通过
pnpm build - ——vitest必须通过
pnpm test - 启动开发服务器并进行接触测试:
bash
pnpm dev &
npx playwright screenshot http://localhost:3000/account /tmp/account.png
Important Notes
重要注意事项
- Next.js required: Import from (uses
@iblai/iblai-js/web-containers/next)next/image - Redux store: Must include and
mentorReducermentorMiddleware - : 5 args (v1.2+)
initializeDataLayer() - : Deduplicated via webpack aliases in
@reduxjs/toolkitnext.config.ts - : Must be
currentPlatformBaseDomain— uses the config helper, not a raw env var. This is correct and intentional.{config.platformBaseDomain()} - Brand guidelines: BRAND.md
- 必须使用Next.js: 从导入(使用了
@iblai/iblai-js/web-containers/next)next/image - Redux store: 必须包含和
mentorReducermentorMiddleware - : 接收5个参数(v1.2及以上版本)
initializeDataLayer() - : 通过
@reduxjs/toolkit中的webpack别名去重next.config.ts - : 必须填写
currentPlatformBaseDomain——使用配置工具方法,不要直接使用原始环境变量,这是有意设计的正确用法。{config.platformBaseDomain()} - 品牌规范: BRAND.md