iblai-chat
Compare original and translation side by side
🇺🇸
Original
English🇨🇳
Translation
Chinese/iblai-chat
/iblai-chat
Add an AI chat widget powered by ibl.ai mentors. Uses the web
component with streaming, session management, and authentication handled
automatically.
<mentor-ai>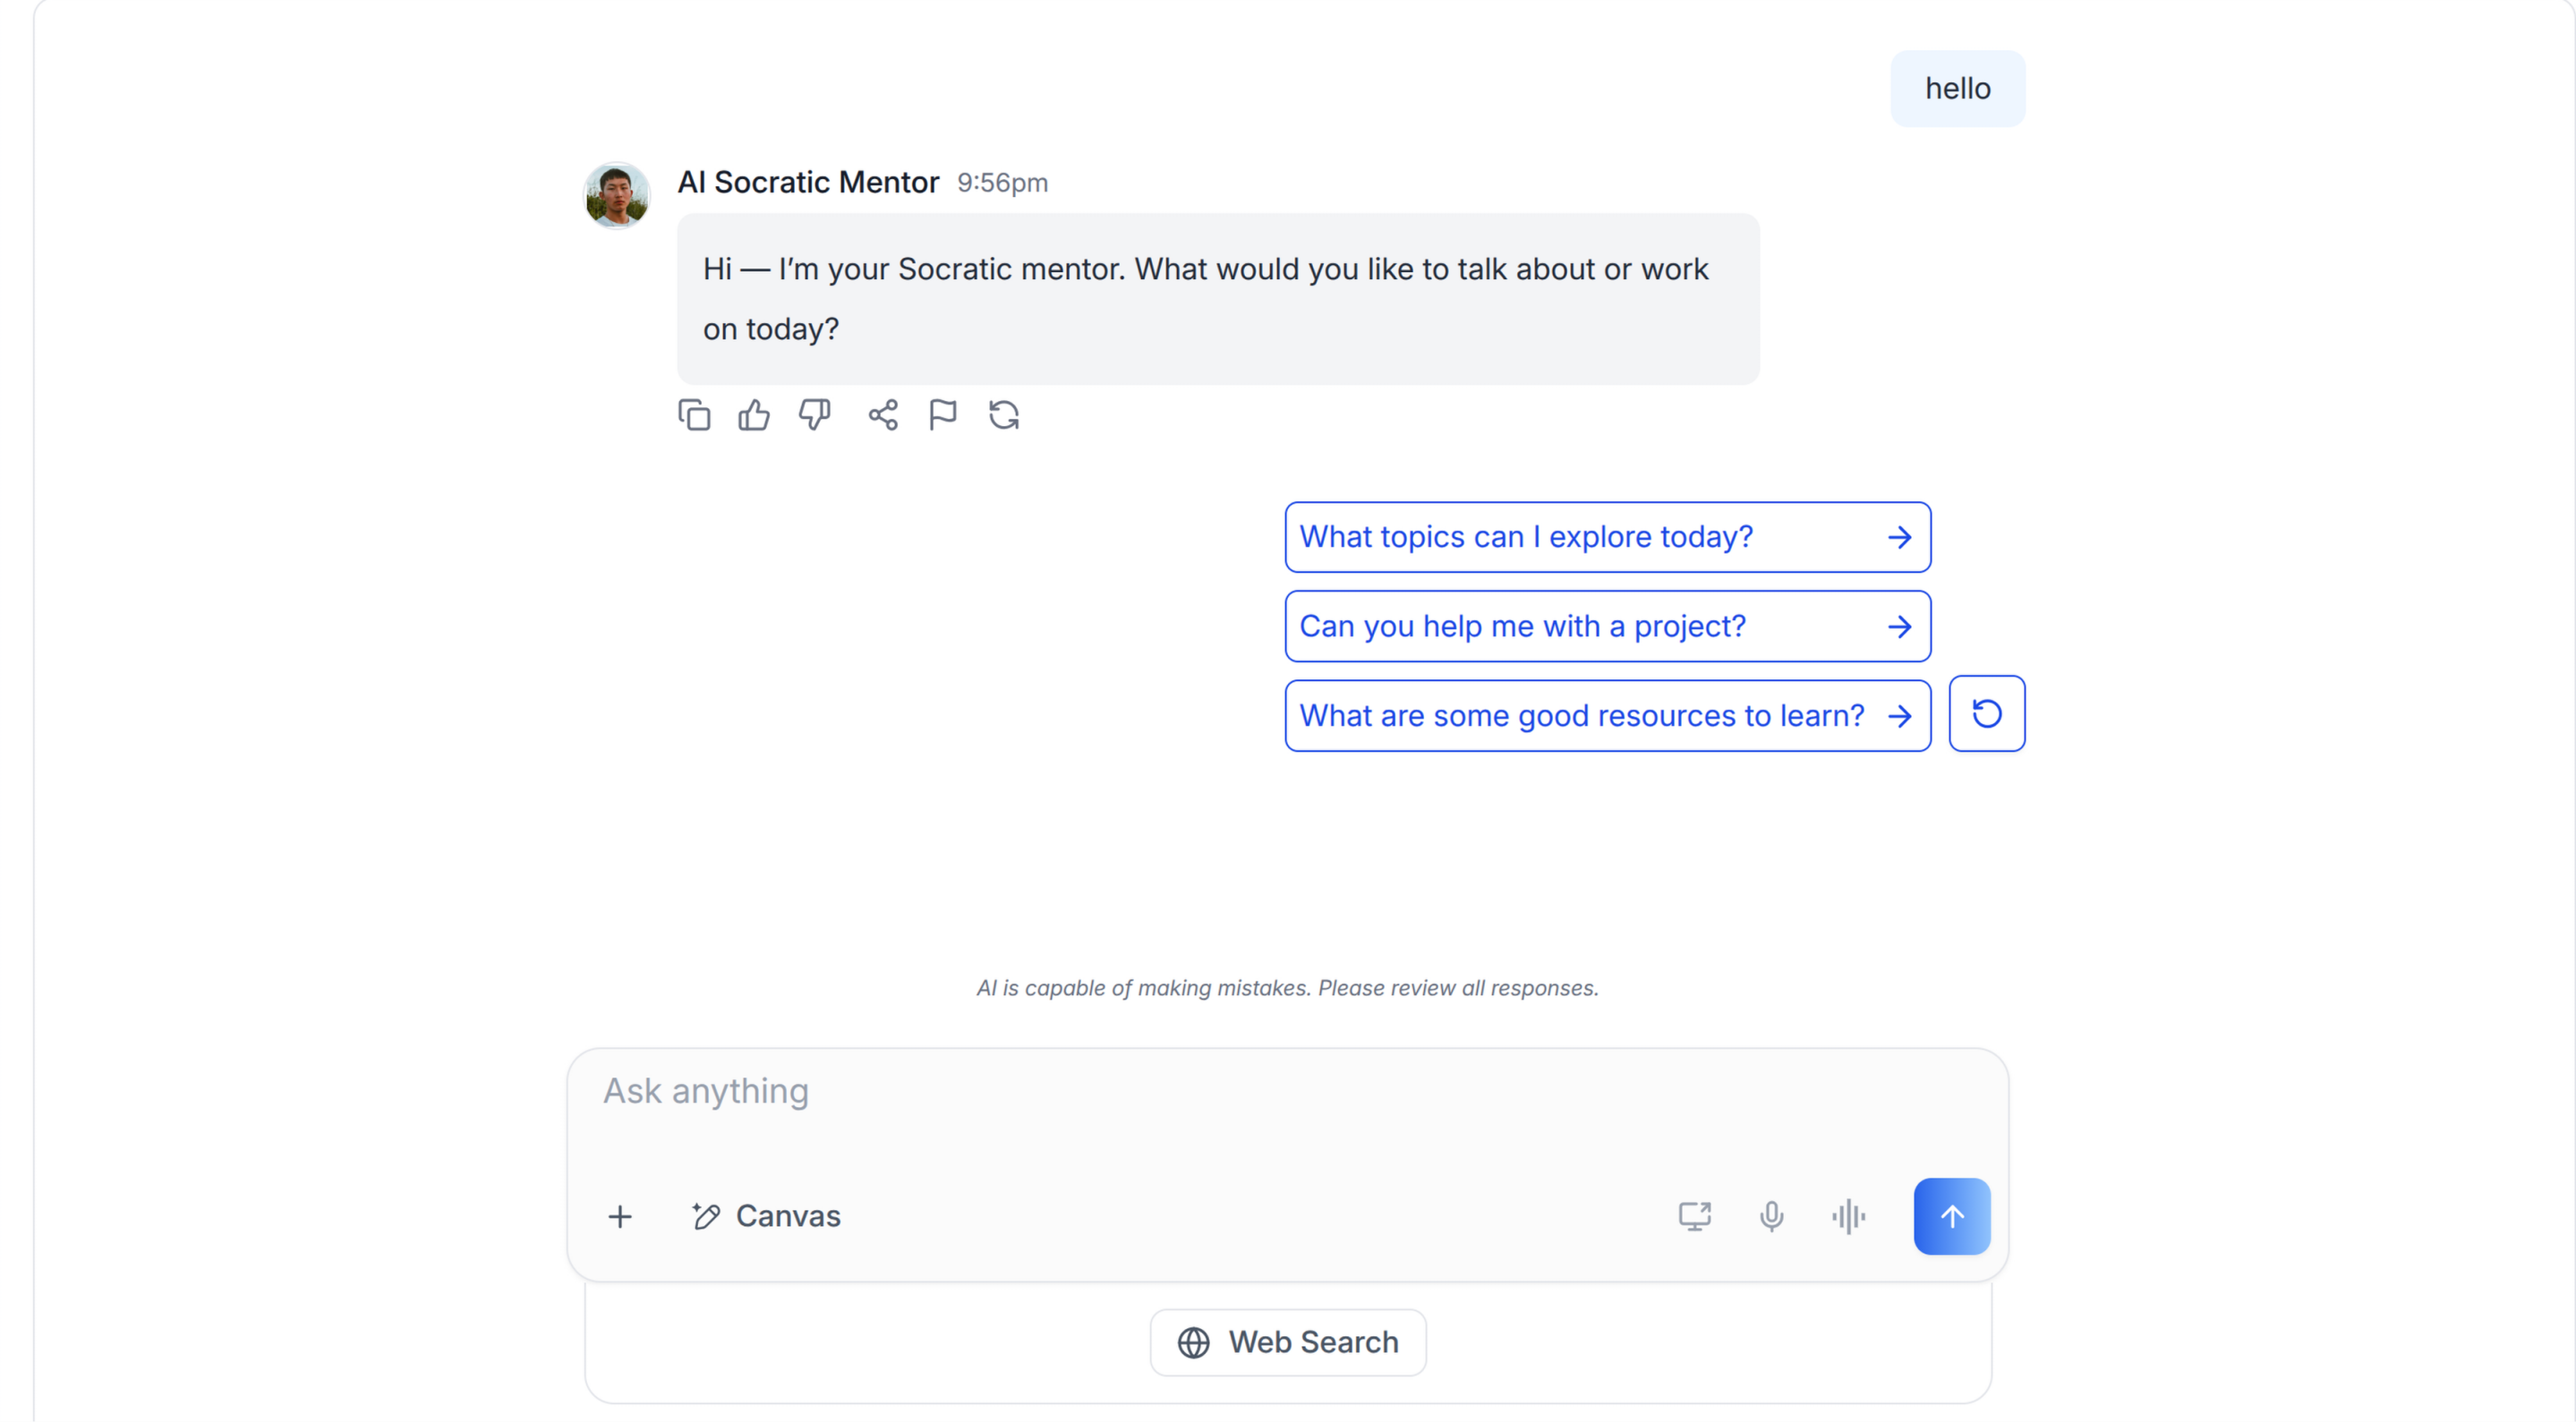
AI Assistant: Before running, you MUST ask the user for their agent/mentor ID (a UUID likeiblai add chat). This is required for the chat widget to connect to an AI agent.3f8a1b2c-4d5e-6f7a-8b9c-0d1e2f3a4b5cIf the user does not have an agent ID, direct them to https://mentorai.iblai.app to create an AI agent. They can find the agent ID in the agent settings page.Once you have the ID, set it in:.env.localNEXT_PUBLIC_DEFAULT_AGENT_ID=<the-uuid-they-gave-you>Do NOT add custom styles, colors, or CSS overrides to the ChatWidget. It ships with its own styling. Keep the component as-is. Do NOT implement dark mode unless the user explicitly asks for it.When building custom UI around the chat widget, use the ibl.ai brand:
- Primary:
, Gradient:#0058cclinear-gradient(135deg, #00b0ef, #0058cc)- Button:
bg-gradient-to-r from-[#2563EB] to-[#93C5FD] text-white- Font: System sans-serif stack, Style: shadcn/ui new-york variant
- Use shadcn components for custom UI -- they share the same Tailwind theme and render in ibl.ai brand colors automatically.
You MUST runbefore telling the user the work is ready./iblai-testAfter all work is complete, start a dev server () so the user can see the result at http://localhost:3000.pnpm devis NOT aiblai.envreplacement — it only holds the 3 shorthand variables (.env.local,DOMAIN,PLATFORM). Next.js still reads its runtime env vars fromTOKEN..env.localUseas the default package manager. Fall back topnpmif pnpm is not installed. The generated app should live in the current directory, not in a subdirectory.npm
添加由ibl.ai导师驱动的AI聊天组件。使用 Web Component,自动处理流式响应、会话管理和身份验证。
<mentor-ai>AI助手提示: 在运行之前,你必须向用户询问他们的agent/mentor ID(类似iblai add chat的UUID)。聊天组件需要该ID才能连接到AI agent。3f8a1b2c-4d5e-6f7a-8b9c-0d1e2f3a4b5c如果用户没有agent ID,请引导他们访问https://mentorai.iblai.app创建AI agent,用户可在agent设置页面找到对应的ID。拿到ID后,将其写入:.env.localNEXT_PUBLIC_DEFAULT_AGENT_ID=<用户提供的UUID>请勿为ChatWidget添加自定义样式、颜色或CSS覆盖,它自带默认样式,请保持组件原样。除非用户明确要求,否则不要实现深色模式。围绕聊天组件构建自定义UI时,请遵循ibl.ai品牌规范:
- 主色:
,渐变:#0058cclinear-gradient(135deg, #00b0ef, #0058cc)- 按钮:
bg-gradient-to-r from-[#2563EB] to-[#93C5FD] text-white- 字体: 系统无衬线字体栈,样式: shadcn/ui new-york 变体
- 自定义UI请使用shadcn组件——它们使用相同的Tailwind主题,会自动适配ibl.ai品牌色。
在告知用户工作完成前,你必须运行。/iblai-test所有工作完成后,启动开发服务器(),用户可在http://localhost:3000查看效果。pnpm dev不能替代iblai.env——它仅存储3个简写变量(.env.local、DOMAIN、PLATFORM)。Next.js仍然会从TOKEN读取运行时环境变量。.env.local默认使用作为包管理器,如果未安装pnpm则回退到pnpm。生成的应用应该放在当前目录,不要放在子目录中。npm
Prerequisites
前置条件
- Auth must be set up first ()
/iblai-auth - CLI available (
iblai). Seeiblai --versionprerequisites for installation./iblai-auth - An agent/mentor ID from the user's ibl.ai platform (a UUID -- get one at https://mentorai.iblai.app)
- 必须先完成身份验证配置()
/iblai-auth - 可用的CLI(可运行
iblai检查)。安装要求请查看iblai --version的前置条件。/iblai-auth - 用户ibl.ai平台的agent/mentor ID(UUID,可在https://mentorai.iblai.app获取)
Step 0: Check for CLI Updates
步骤0:检查CLI更新
Before running any command, ensure the CLI is
up to date. Run to check the current version, then
upgrade directly:
iblaiiblai --version- pip:
pip install --upgrade iblai-app-cli - npm:
npm install -g @iblai/cli@latest
This is safe to run even if already at the latest version.
运行任何命令前,请确保CLI是最新版本。运行查看当前版本,然后直接升级:
iblaiiblai --version- pip:
pip install --upgrade iblai-app-cli - npm:
npm install -g @iblai/cli@latest
即使已经是最新版本,运行该命令也不会有问题。
Step 1: Check Environment
步骤1:检查环境
Before proceeding, check for a
in the project root. Look for , , and variables.
If the file does not exist or is missing these variables, tell the user:
"You need an with your platform configuration. Download the
template and fill in your values:
"
iblai.envPLATFORMDOMAINTOKENiblai.envcurl -o iblai.env https://raw.githubusercontent.com/iblai/vibe/refs/heads/main/iblai.env继续操作前,检查项目根目录是否存在,确认包含、和变量。如果文件不存在或缺少这些变量,请告知用户:
"你需要一个包含平台配置的文件。下载模板并填写对应值:
"
iblai.envPLATFORMDOMAINTOKENiblai.envcurl -o iblai.env https://raw.githubusercontent.com/iblai/vibe/refs/heads/main/iblai.envStep 2: Get Agent ID from User
步骤2:向用户获取Agent ID
Ask the user for their agent/mentor ID. This is a UUID that identifies the AI
agent the chat widget will connect to.
AI Assistant: Once the user provides their agent ID, write it directly tousing the Edit tool — do NOT echo it back in shell commands. Add or update this line in.env.local:.env.localNEXT_PUBLIC_DEFAULT_AGENT_ID=<the-uuid>
询问用户的agent/mentor ID,这是聊天组件连接的AI agent的唯一标识UUID。
AI助手提示: 用户提供agent ID后,直接使用编辑工具写入——不要在shell命令中回显该ID。在.env.local中添加或更新以下行:.env.localNEXT_PUBLIC_DEFAULT_AGENT_ID=<用户提供的UUID>
Step 3: Run the Generator
步骤3:运行生成器
bash
iblai add chatThe generator creates the chat widget component and patches the Redux store
to include chat-specific reducers.
bash
iblai add chat生成器会创建聊天组件,并修改Redux store添加聊天相关的reducer。
What Was Generated
生成的文件
| File | Purpose |
|---|---|
| |
The ChatWidget reads , , and from localStorage
and passes them to the MentorAI iframe via mode.
axd_tokentenantuserDataauthrelyonhost| 文件 | 用途 |
|---|---|
| 带身份验证令牌传递的 |
ChatWidget会从localStorage读取、和,通过模式传递给MentorAI iframe。
axd_tokentenantuserDataauthrelyonhostStep 4: Use the Widget
步骤4:使用组件
tsx
import { ChatWidget } from "@/components/iblai/chat-widget";

// Full viewport (recommended)
<ChatWidget mentorId={process.env.NEXT_PUBLIC_DEFAULT_AGENT_ID!} width="100vw" height="100vh" />

// Custom viewport-relative dimensions
<ChatWidget mentorId="..." width="80vw" height="90vh" />

// Or hardcode an agent ID (useful for multi-agent pages)
<ChatWidget mentorId="3f8a1b2c-4d5e-6f7a-8b9c-0d1e2f3a4b5c" width="100vw" height="100vh" />
tsx
import { ChatWidget } from "@/components/iblai/chat-widget";

// 全屏显示(推荐)
<ChatWidget mentorId={process.env.NEXT_PUBLIC_DEFAULT_AGENT_ID!} width="100vw" height="100vh" />

// 自定义视口相对尺寸
<ChatWidget mentorId="..." width="80vw" height="90vh" />

// 也可以硬编码agent ID(适用于多agent页面)
<ChatWidget mentorId="3f8a1b2c-4d5e-6f7a-8b9c-0d1e2f3a4b5c" width="100vw" height="100vh" />
Props
属性说明
| Prop | Type | Default | Description |
|---|---|---|---|
| | (required) | Agent/mentor UUID -- ask the user for this |
| | from | Override tenant key (defaults to |
| | | Color theme |
| | | Widget width -- use |
| | | Widget height -- use |
| 属性 | 类型 | 默认值 | 描述 |
|---|---|---|---|
| | (必填) | Agent/mentor UUID -- 需向用户询问 |
| | 来自 | 覆盖租户密钥(默认值为 |
| | | 颜色主题 |
| | | 组件宽度 -- 推荐使用 |
| | | 组件高度 -- 推荐使用 |
Step 5: Verify
步骤5:验证
Run before telling the user the work is ready:
/iblai-test- -- must pass with zero errors
pnpm build - -- vitest must pass
pnpm test - Start dev server and touch test:
bash
pnpm dev &
npx playwright screenshot http://localhost:3000 /tmp/home.png
告知用户工作完成前请运行:
/iblai-test- -- 必须零错误通过
pnpm build - -- vitest必须通过
pnpm test - 启动开发服务器并做触控测试:
bash
pnpm dev &
npx playwright screenshot http://localhost:3000 /tmp/home.png
Detailed Guide
详细指南
For the complete implementation reference:
https://github.com/iblai/iblai-app-cli/blob/main/skills/components/iblai-add-chat.md
Brand guidelines: BRAND.md